
What every member of a project team must know before, during, and after installation of stone
Article originally written by Mike Buechel for Masonry Design Magazine
Stone. The term doesn’t have the same meaning it did 50 years ago. There was a time when someone would say “I’d like to put stone on my project” and everyone had a pretty good idea what they were considering. That was then. The legitimacy of the word has completely turned upside down.
Now, “stone” can mean just about anything with tag lines and terminology that completely blurs the lines of real and fake. The list of “stone” products today is so long, installation options so varied, and specifying requirement often so complex that stone used in masonry could have its very own Wiki-style encyclopedia to try and explain it; and everyone still would not be able to agree on what terms and definitions would actually be acceptable.
Daunting as it might be, I’m going to try and help with some of the mystery and fuzzy terms used in the stone masonry world and give you insight into how simple natural stone is. I’ll discuss how important it is for everyone to be on the same page when projects incorporate masonry, specifically stone; review things all parties should discuss when specifying, selecting, and installing stone, understanding the differences in stone; give a few basic hints to be more productive; and wrap it up with some examples of epic fails.
When is a stone not a stone?
Let’s start with the most basic principle when it comes to stone. It’s sort of like a quote from the movie What about Bob. “There are two types of people in this world: Those who like Neil Diamond, and those who don’t. My ex-wife loves him.” Stone’s got the same kind of black-and-white comparison. “There are two types of stone in this world: those made in a factory and those made by Mother Nature. Factory-made stones want to be natural stone.”
Most people would never realize there’s such a thing as fake stone. The manufactured stones are really clever at making you think you’re getting something original or unique, and in the end it is really basic – it’s either real or fake. I’m not going to go through the plethora of options in the stone industry, but wanted to begin with this ultra-basic example – cast stone trying to emulate natural cut stone, and manufactured stones trying to duplicate natural building stones. Through this article I’m going to focus on natural stone used in masonry. It’s what I know best, and it’s one area often not as well understood by specifiers, masons, and contractors.
Basic Stone Terminology
Building stone probably has the greatest range of meaning around the country. If you’ve been part of any building project in the last 75 years, few if any of those projects likely used stone in its true building stone application where the stone is the structural framework of the building. Today, stone for the most part is a facade. The structural importance of stone just isn’t a factor anymore (although a lot of attention is paid to the durability of stone).
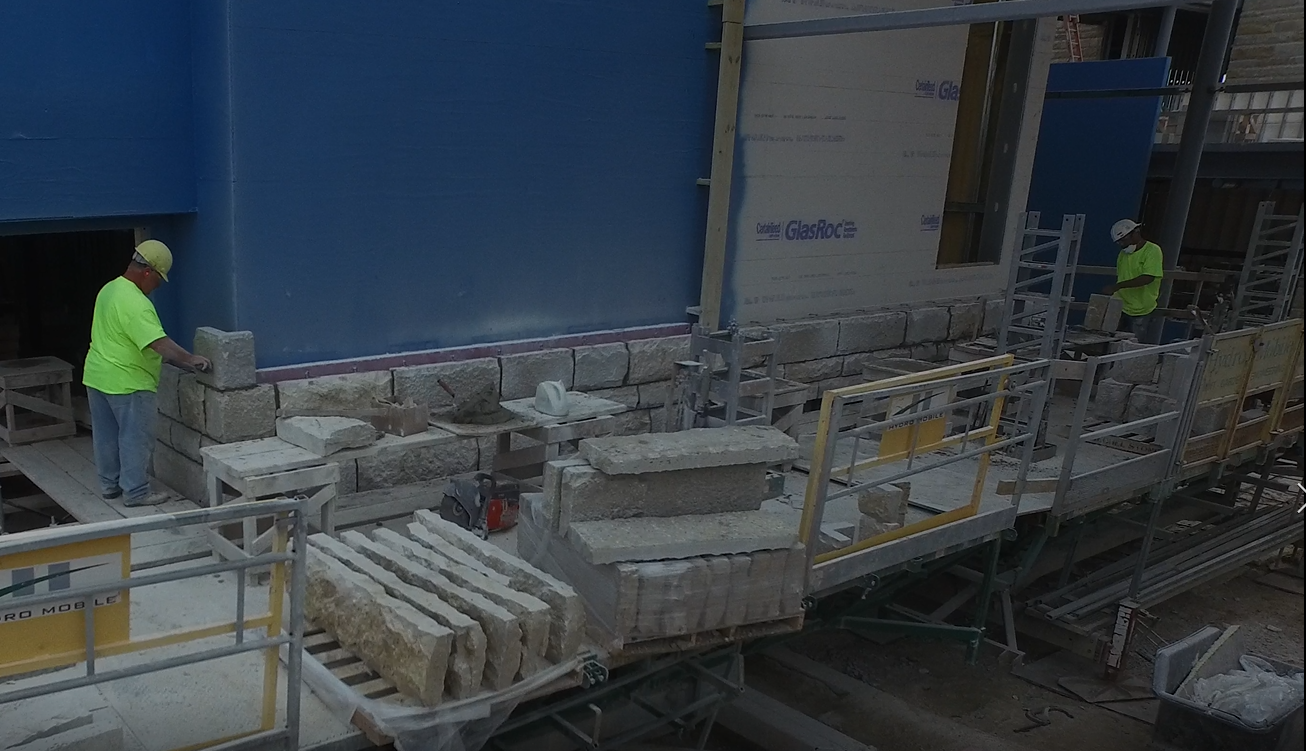
Building stone, for Buechel Stone at least, is considered natural stone used to clad a project. Building stone encompasses Full Veneer and Thin Veneer as these types of stone are used “on buildings”. Full veneer is natural stone nominally 3 to 5 inches in bed depth, with some options as much as 8 inches in bed depth depending on the type of stone and installation you’re considering. Thin Veneer is a natural stone nominally ¾ of an inch to 1 ¼ inch in bed depth and needs to be less than 15 pounds a square foot.

Although they are both natural stone, there is quite a difference in installation procedures. Full veneer needs a stone ledge incorporated with the foundation wall for the stone to rest on. The stone is also anchored to the wall with some fashion of wall ties or similarly specified anchoring system. Thin Veneer falls under the category of “adhered masonry,” meaning it’s stuck directly to the wall and can hang without a support ledge. Here too there are quite a few installation options.
So that’s the basics of natural stone used as a building facade. Nothing too hard for most of you to grasp as this audience obviously is familiar with the basics of masonry. So I will to spend more time on what happens before the installation, during, and after installation as all too often steps are missed or assumed which can result in a project that doesn’t end in success or meet expectations.
Setting Expectations
Being a really good Natural Stone mason can result in a bit of an anomaly. It forms a marriage of two opposing views – time is money, and you can’t rush art. There are true stone masons able to work both sides of this marriage, and when you watch them work it is truly awe inspiring. It’s almost like they can “feel” where the stone fits, and can trim the stones with an accuracy and consistency that just can’t be taught. This is where setting expectations at the very beginning of a project is critical. Not every mason will be the right fit for the job. It’s amazing how many projects I’ve stopped by where there isn’t even a chisel or masonry saw on the project. You know those are the ones where speed of installation is the most important factor.

That’s ok though. That’s the point of setting expectations, and expectations come from direct communication, not just something put into a spec. All too often communication seems to be an afterthought or things are assumed to be covered. I find it interesting it’s seldom questioned the masonry is typically awarded based on price, whether it’s the mason or the supplier. There might be something in the spec like “must have 5 years similar experience” or something along those lines. How often are these types of requirements truly followed or considered? That’s not really my point. Once the mason is selected, they often have to do a mock-up for the project. This is an area where expectations are often not communicated well. First, who is to say the mock-up done by the selected mason is the best for the project? All too often suppliers are expected to submit materials for approval and can be competing against several different companies to get the right “look”. Even the best, most pristine stone supplied can look like complete rubbish if the mason is not familiar with the final install looks and requirement. Besides the right look, what pieces of stone is the mason using, or more importantly not using? Here again, there have been instances where pieces are omitted from a blend. The architect or final decision maker comes by and gives the panel a yay or nay. The project can be won or lost based on that panel. Now the project is awarded, stone is sent to the project, the mason starts laying up the stone, and all of the sudden people start wondering why the project doesn’t look right. Yet the supplier was just told their stone was approved without anyone pointing out the layup isn’t really the correct blend of the material shipped. In the meantime, the GC took the mockup down and no one took any pictures… again, communication to set expectations. A few pre-project meetings and photos can save a lot of headaches and problems before the first stone is installed.

The mason is such a key factor in a project. So many reputations rest on their shoulders. They obviously have their own reputation, but they also carry the burden for the reputation of the stone supplier, the general contractor, the architect, and the project owner. This could be said for many of the tradesmen associated with the project, but there are very few areas of the project as obviously visual to the rest of the world as the masonry.
Who’s in Charge?
It is important to understand who has the true final say in the project. If you’re getting the ok from the general contractor, but the architect is heavily influencing the end result you have to make sure they’re part of the discussion process. Before starting, have an agreement with the proper channels on how you are going to keep in touch during the project. For quick questions, should you text? How about sending photos at specified times? Having this discussion right at the beginning will make everyone know who is responsible for each area.
It’s important everyone knows their personal responsibilities before the job starts. Even the best blueprints often have inconsistencies. It’s amazing how often an estimator will comb through a set of plans and find conflicting information, from walls showing up on one page and magically disappear on a references cross section; to one page showing the option in stone and the next showing it in brick. So a simple thing, like is it full veneer or thin veneer might not be spelled out. Some projects have both full veneer and thin veneer, making the quoting process even more detailed. Make sure you know what’s going where. Specs are often cut and pasted into the spec book. This is a great thing to help speed up the process for the architectural specifiers, but it is important to make sure they give you the details needed to quote the exact same thing as everyone else.

FLASHBACK – I still remember years ago we had a customer in the showroom for a rather large residential project. The general contractor and mason contractor were already selected, and both were very reputable businesses. When the customer selected the actual materials, they selected a lower to mid-priced stone (full veneer). What they selected next though resulted in a battle that ended very ugly. The homeowner picked a mortar containing a white-based Portland cement and a cut stone that was not the product used for the original quote. Both of these options were considerably more expensive than what was budgeted, but neither the mason nor the general contractor relayed that to the homeowner because that’s what they selected. In the end the mortar and cut stone details ended up being double what was in the allowance, and on a big home, those numbers add up quickly. The customer was not aware there was an allowance on the masonry for the materials as it was a lump sum quote. The mason thought the general contractor talked with the home owner about the cost, the general contractor assumed the mason told the owner, and the consensuses was they’d be ok with the prices because that’s what they selected. They were wrong. Again, you can never over-communicate about details in a project. The homeowner was in charge of the final decision, but no one asked – do you want to pay more money or do you want to get what was in the spec?
When it comes to deciphering who’s in charge, it can be a tricky thing, and you might not be getting the same decision maker as the others bidding the job. Who gets to decide something when there’s a spec like “gray adhered stone in a random ashlar pattern to meet ASTM standard xyz.” Is it real or fake stone? Whose version of “gray” is being used? Is it just about submitting the lowest priced option that somehow fits that description? Who gets to decide what’s acceptable? Have you ever tried to work with descriptions like what is discussed in the following video excerpt.
Installation 101 – how to avoid epic failure
So you were awarded the project and they liked the work you did on the mock-up. Now what? Again, seems like it should be rather straightforward. On larger jobs I’ve seen something that seems like it wouldn’t be a big deal, but is skipped. If the mock up panel is still on-site, make sure all the masons and laborers check it out and review with the final decision makers what they like about the panel and what is ok to do and not ok to do. Make sure to get your own picture of the finished panel. If the panel is gone, make sure whoever installed it works with the rest of the crews to make sure everyone’s laying the stone the same. It’s not about how good or tenured all the masons are, it’s about everyone doing work that looks the same throughout the project. At least once a year I’ll be walking somewhere and see a stone project where you can obviously see different masons laid the stone on different areas of the building. I know most people will just walk right by and think “wow, nice building; look at all that stone.” That’s not the point. It’s about making the job look good all around. Stone is not brick or block. The same stone can be open to a lot of interpretation at the time of installation.
If the project is something other than a running bond installation, there are a few good rules of thumb to remember. First, keep horizontal joints under four feet. This is a little bit of a judgement, but it is mostly related to larger wall areas of stone. If it’s a smaller wall, say just a four to six foot long wall, just make sure it looks good to the eye and doesn’t run more than half of the length of the wall.
Vertical joints have two things that should be followed. One is the minimum recommended spacing between vertical joints. Never have them less than four inches apart. This also leads into the other – do not have long vertical joints. If joints are four inches or less apart and stacked on top of each other they really stick out. The old rule of thumb on linear stones is trying to keep a 2:1 or 3:1 pattern where the heights of two stones (or three) equal the height of one stone.
Another key thing to consider is the consistency of a mortar joint. All too often you see a project where the stone is almost drystacked on top of each other, and then there’s a one inch joint right next to it. It just looks terrible and sticks out really bad. This happens on mosaic style installs more commonly as it can be difficult to have the mortar joint stay consistent without trimming the stone. So if you aren’t trimming stones, you’ll see it in those installations for sure.

My biggest pet peeve though is when someone is laying an ashlar style stone and trims the stone to fit the space. Ashlar and Castle Rock stones are to be laid as squares and rectangles or trapezoidal patterns, depend on how the blend is supposed to look. Trimming stone to look like an “L,” “T,” or “Z” to fit into a space is the biggest no-no. I just shake my head when I see this. There is nothing about this type of install that’s ok.

Where masonry is located and what types of materials are used is something that should be reviewed before installation. One area to watch is a chimney chase. Chases framed in wood need special attention for climates that have cold winters. Wood can grow and shrink dramatically, and an icy night with the fireplace roaring can result in the wood expanding quickly. We’ve had projects where the inside of the chase wasn’t insulated properly, and the stone cracked the whole length right through the stone at the corners. Originally the thought was the mason didn’t wrap wire lath around the corners correctly (another common installation error). When they pulled some stone off they found the lath was fine. The issue was there wasn’t any insulation in the chase, and they had a high efficiency fireplace that cranked out the heat. It wasn’t the mason’s fault, but a little consideration on material interaction could have saved some major problems.
Speaking of wood, it’s a pretty well-known fact wood, stone, and steel all have different shrinking and expansion levels. It’s one of the reasons you have to wrap meth lath around corners into the studs, as shrinking and expanding will break even the hardest stone. It’s happened not only on exteriors where there’s chance of water getting behind the stone, but on interior fireplaces too as the heat can expand the wood. We had one project where the mason obviously didn’t know about the changes in movement between wood and stone. On this project they had small stone pillars framed in wood. They not only didn’t wrap the mesh around the corners, they didn’t even put roofing felt down before attaching the mesh. To top it off, they laid the stone right on top of a wood deck with the mortar tight to the wood. It wasn’t long and the whole thing was cracking, and again – a very nice house with a mason that’s laid stone before.

Tips
There are a few things you can do to help make sure everything on your job goes great and you make the money you were anticipating. One thing I’ve seen masons do is get the stone laid out ahead of time. Really good laborers will not only lay out the stones ahead of time, they’ll grab from multiple pallets so the stone gets a better total blend. The really, really good ones even sort out the pieces by size and/or length. This way as you’re installing the stone you can more easily call out, “I need a 16 by 4” (sixteen inches long by 4 inches high) and the laborer can “eye-spy” the right piece for you quicker.

For whatever reason, it seems one of the least used tools of the trade is your phone. With technology as available as it is today, make sure you put as much of it to work for you as possible. The camera on your phone is a tool you can’t underutilize for so many parts of the job. Before you start, take pictures of the walls: everyone will then know what backer was used, how the flashing was incorporated, and if is there was any moisture barrier installed on the wall. Once the wall is up, you obviously have no good way to tell what’s going on behind there. Then, take pictures for each step: for full veneer show you’re keeping the airspace required and the cavity clear of excess mortar. For thin veneer show how the mesh is anchored and things like wrapping the corners correctly.
You should also use your phone the first day to take a photo of the project and send it to the decision maker(s). There have been numerous projects throughout the years where a mason is working on a project for a week or more and thinks things are going great. Suddenly the decision maker shows up and says “I don’t like this, and this, and this….” Suddenly you’re cutting out stones with a chop saw and trying to tuck point new stones into place (and you know mortar never matches up quite right). Worse – they say it’s all wrong and you have wall areas that need to come down.One trick I’ve seen is really simple, but can save a ton of ugly issues later on. If you have a spot where there is a transition between your stone and another cladding like stucco or siding, take a 1×2, 2×4 or something similar and put it where the stone is supposed to stop and the sill is supposed to start. See the example of a bad sill install below. I know some people will snap a chalk line for this and that’s not bad, but by putting the wood in place it forces you to pay attention to where the stone is going to stop before you add the sill. Once you have the stone done you can pull the length of wood down and have a perfect line to put the sill on. Just make sure you consider the thickness of the sill you are using, along with a mortar joint! When you pull the piece of wood off the wall, make sure to fill the screw holes in so you don’t have a spot were water can infiltrate the wall.

Tools are another area often overlooked. If you are a true stone mason, you have to have good chisels, and not just one type. Good chisels have a feeling in your hands that is balanced, and just feels “right.” We sell some made by a local blacksmith that forges each one by hand and makes tools almost exclusively for stoneworking. Another company is Trow and Holden. They offer professional tools as well. One chisel you don’t see often but is just about the best there is to speed up the trimming is a point. The small chipping edge allows you to take off high points and clean up stone without trying to force a 2” wide chisel on a small imperfection of the stone. A small scale splitter is also amazing at speeding up the process. The advantage of these over a saw is it snaps the stone fairly quickly, and doesn’t leave saw marks. For thin veneer though, a diamond saw is great. Thin stone isn’t always easy to trim with a splitter or brick hammer. One key thing I’ve found though is to make sure and cut the back of the stone, and cut it roughly half way through. Then, tap the end on a hard surface to snap the remaining part off. This way it will still have a natural finish on the face if you rake the mortar joint back.

So to wrap this up, the most important thing you as a mason must do is communicate, communicate, communicate. Assumptions throughout a project so often result in something going terribly wrong. Almost every project problem or issue I’ve seen or helped with could have been avoided if someone along the way talked to someone else on the project specifics. It seems like the more ways we have to communicate, the less likely we are to actually do it.

Leave a comment