I’m no mason by any stretch of the imagination, but I’ve done and seen enough to know what’s good and what’s a little questionable.
It is the quality of our work which will please God and not the quantity.
Mahatma Gandhi
I Love Masonry. I don’t really discriminate on materials either; stone, brick, block – it’s all good! Of course my preference is natural stone, but I can’t help but notice projects using masonry, whether good or bad.
One thing I wanted to use my blog for was to help the industry to take a better look at what is good or acceptable. I’ve often said no matter how good you make a product, if the installation is done by someone without proper care and technique it’s not going to end well. It might not even be a problem in the short-term. We’ve had our fair share of projects that look ok to the eye, but the install was not done correctly resulting in long-term problems. In this post I’m highlighting some bad installs I’ve run across in the past year or so, and plan to show more as they come up on my Instagram page. My view is not to point it out because it is bad, but to help educated people on what to look for and why these projects don’t quite fit the bill. Don’t get me wrong – in the world of masonry it truly can be “in the eye of the beholder,” so I’ll try to keep it to the most egregious😂! Swipe to see all photos!
Original stone
Repair work?
Repair work?
Not sure how someone would think this is ok
This stonework was on a hotel I stayed at. It looked like someone drove into one of the rooms, so they had to repair the stone work. Isn’t it amazing that having the stone below grade is probably the least likely problem this install is facing!
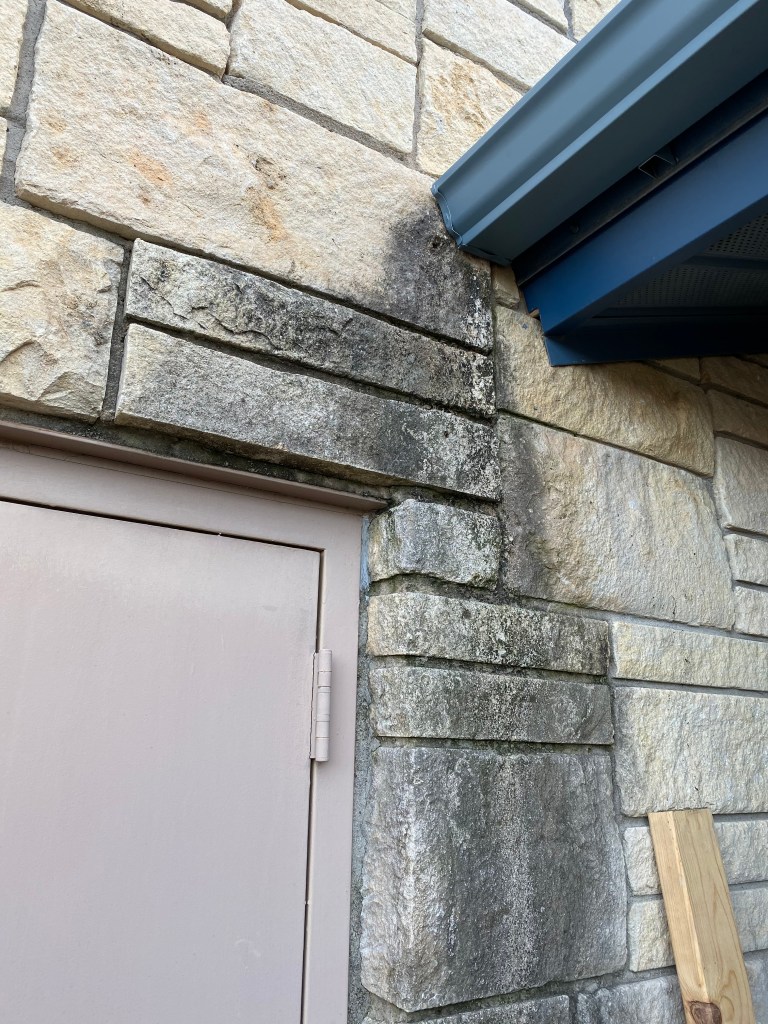
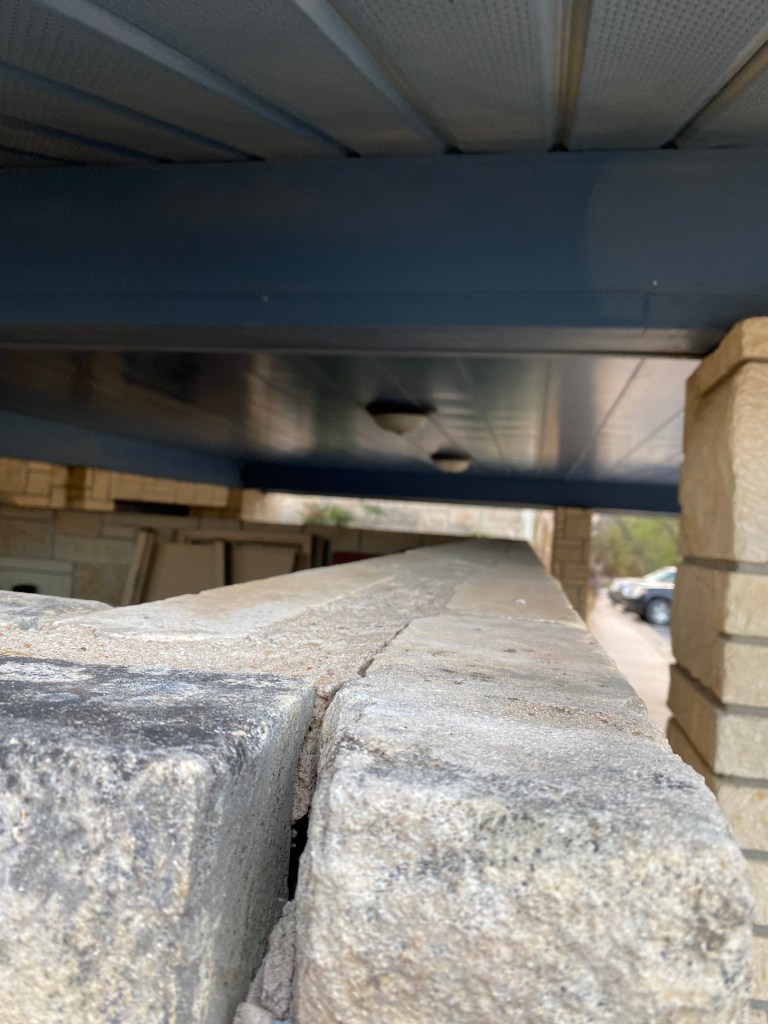
Looks good but…
No kickout flashing to gutter
No form of capping
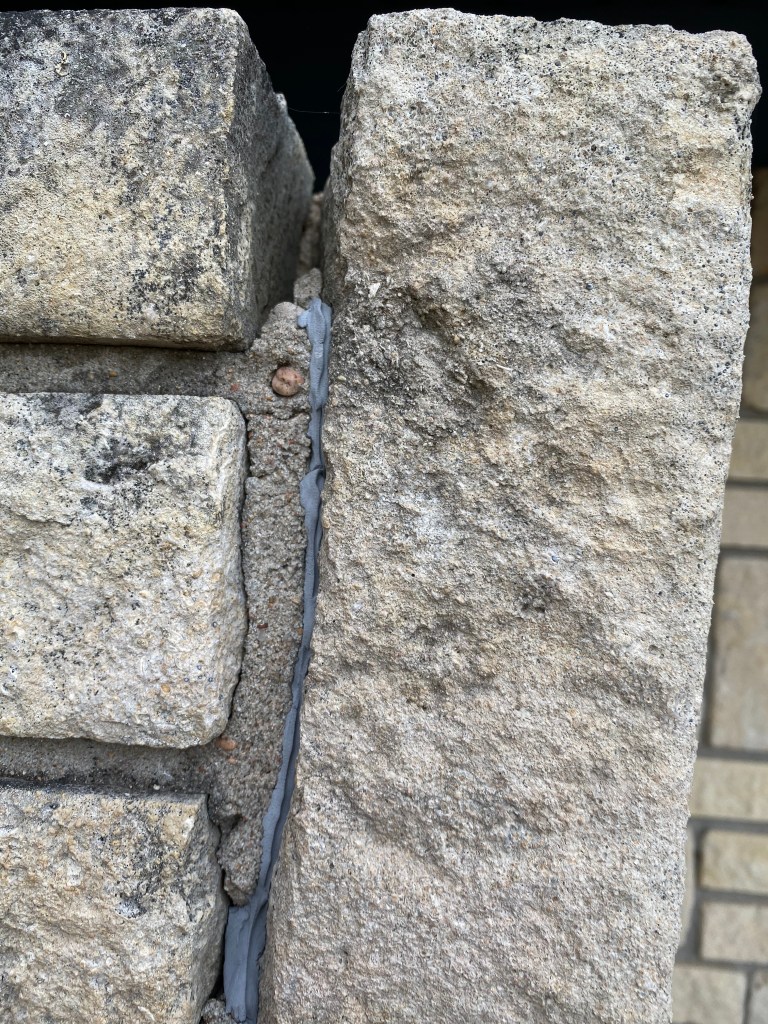
Trying to fix joints with caulk
No coping leaving water intrusion a problem
This freestanding wall is used as a barrier to create an outside storage area under this overhang. Again, the initial install looks nice. There were several shortcuts taken that resulted in long-term problems. The first is a missing kick-out flashing on the roof to kick the water away from the masonry and into the gutter. By missing this small feature, the rainwater is running down the face of the stone causing severe staining and likely damaging the backup wall due to extreme saturation.
The barrier wall install had a shortcut of being a solid masonry wall that is not flashed. Also, with no coping on the top of the wall, water easily gets behind the stone, and with no way for the water to get out has resulted in the stone falling off the wall and mortar joints being etched away. To add insult to injury, they tried fixing the joints with silicone caulk. Caulk will not breath and only result in even more problems. This could have been avoided with a four-inch block wall in the center, an air and water barrier applied to the block and flashing and weeps at the base of the wall. It also should have a solid coping piece on top, anything from a stone cap to a metal cover with a drip edge.
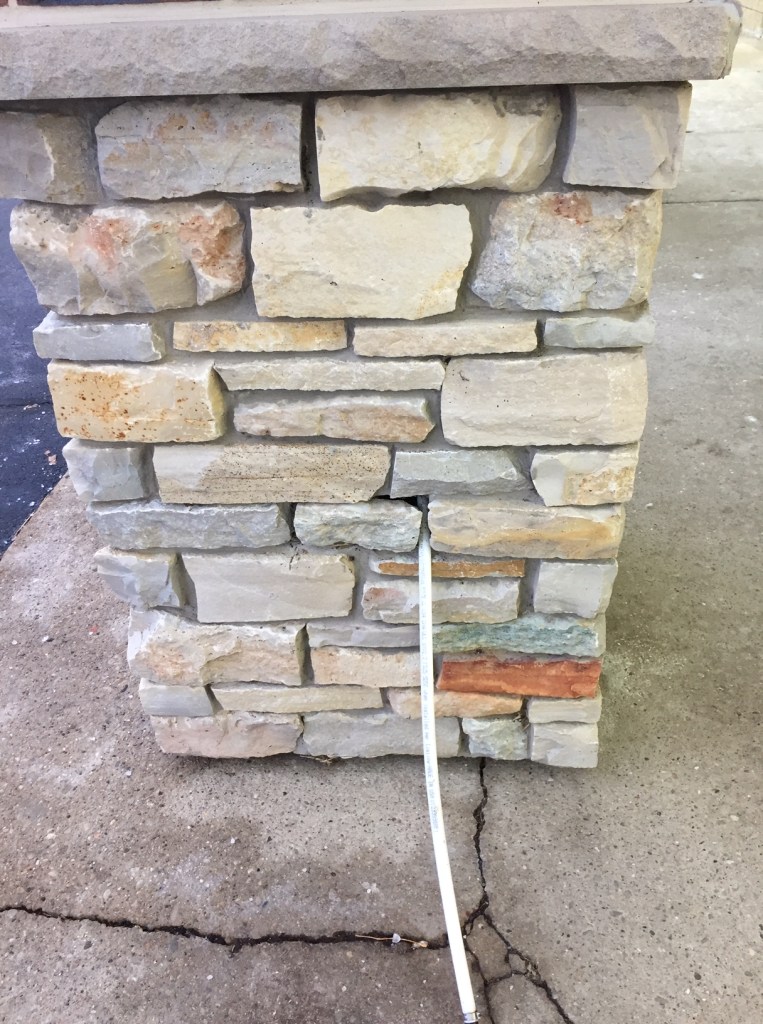
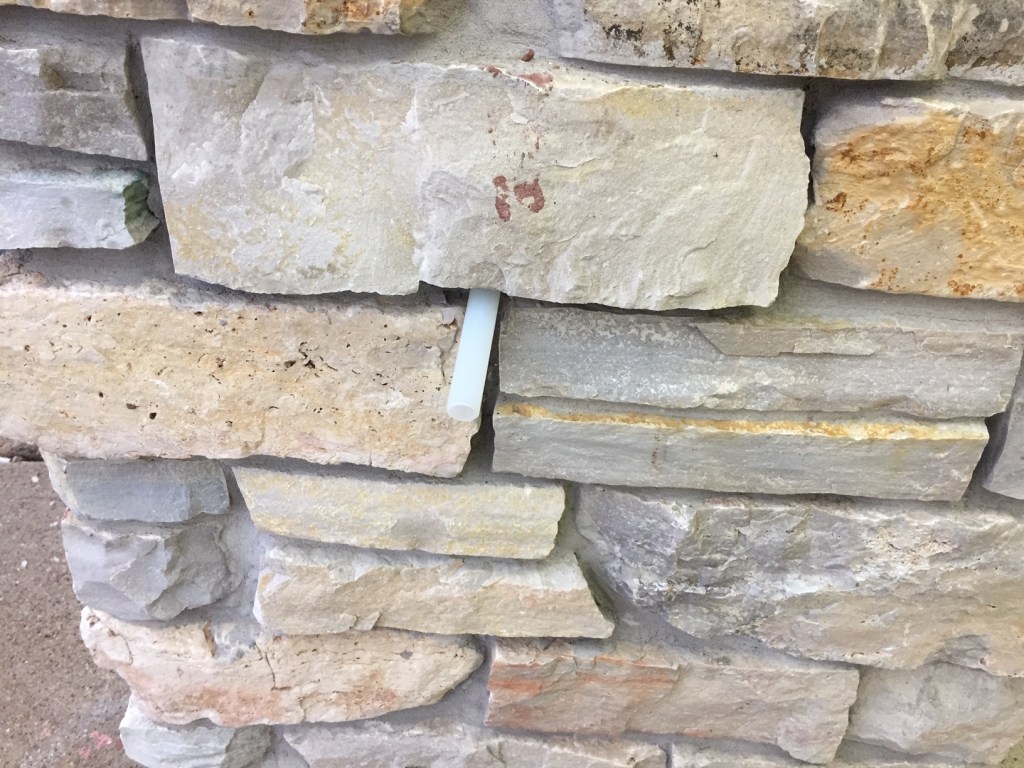
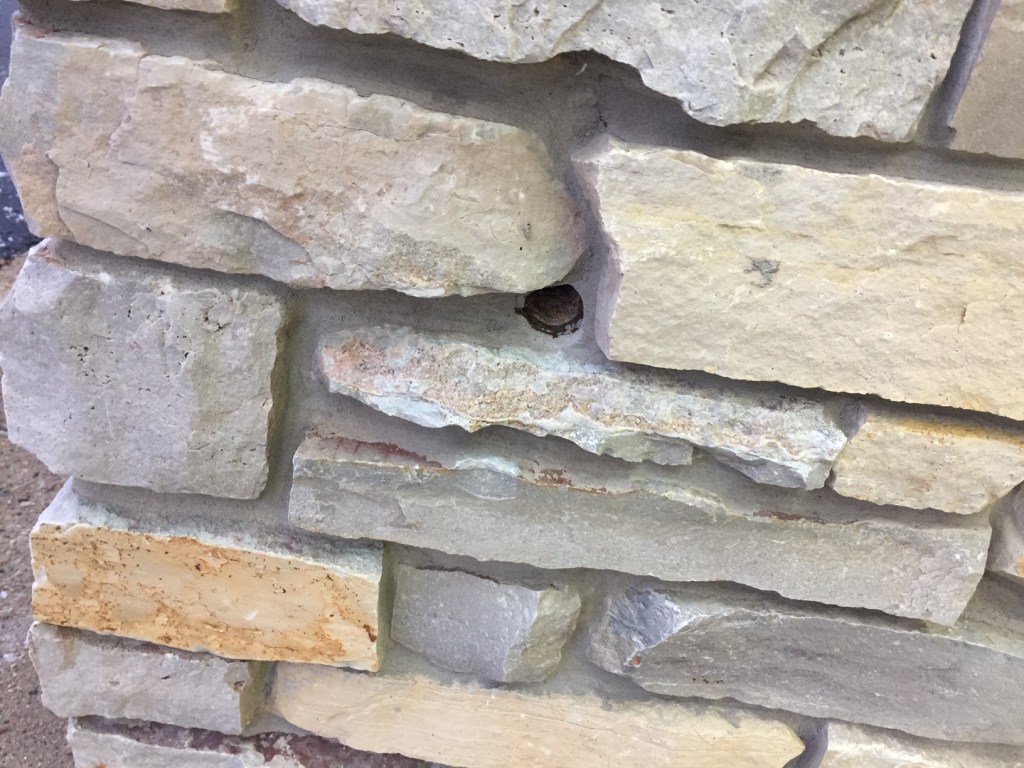
Weep?
Weep?
Home for a mud wasp?
I’m not sure what the thought was with this project. On the one hand, they did a good job by keeping the stone about 1″ off the concrete below. You can tell this was added recently as the concrete is obviously old and cracked.
I get they are trying to add weeps with the tube and attempt to add weeps to this project. Why they decided to add them in the middle of the pillar, no idea. It will do nothing to help. Maybe if there was a flashing that would push the water to the weep opening, well then maybe… The one with just a hole looks like the water would run down the back of the mortar, creating an even bigger problem.
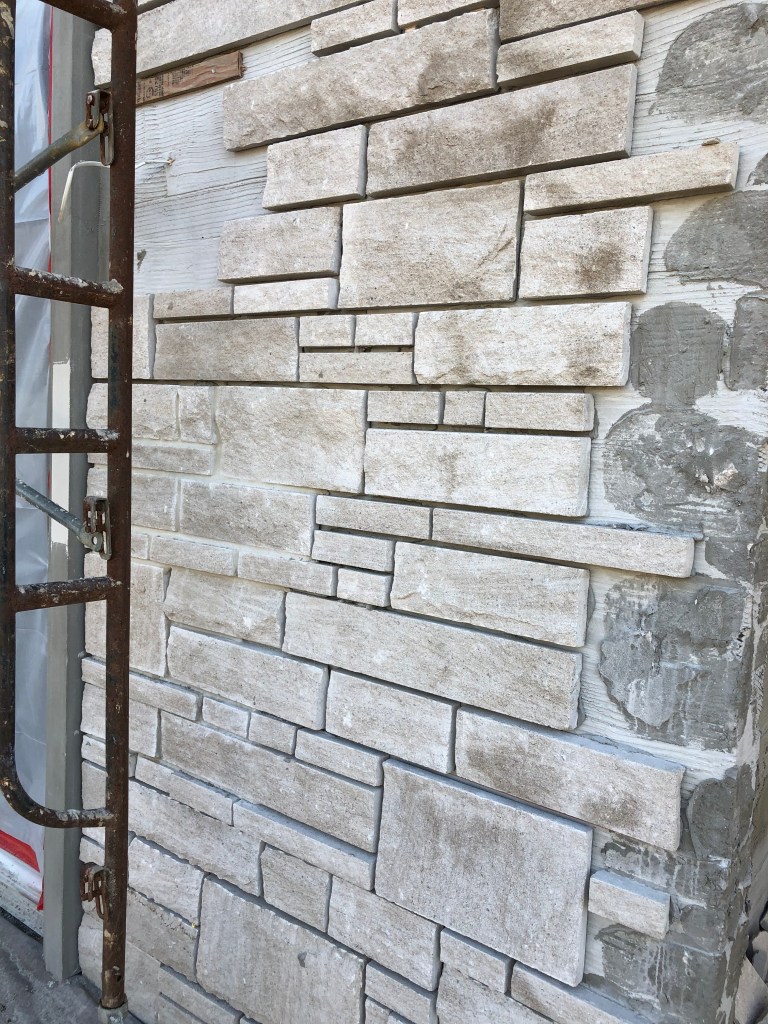
Smile and wave boys, smile and wave…
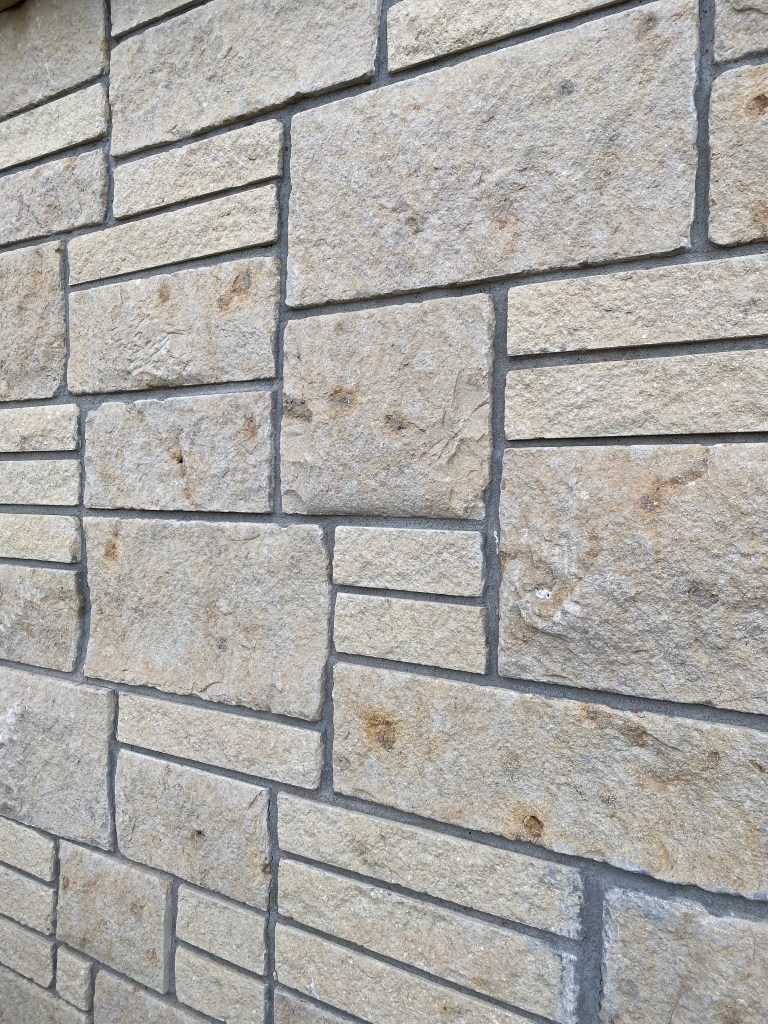
You can’t install brick poorly right? Well… not true. This brick was waving as I walked up to it. I’m not sure if they decided to run without a line or a level, but it gives a three-dimensional look I’m guessing wasn’t on the plans.
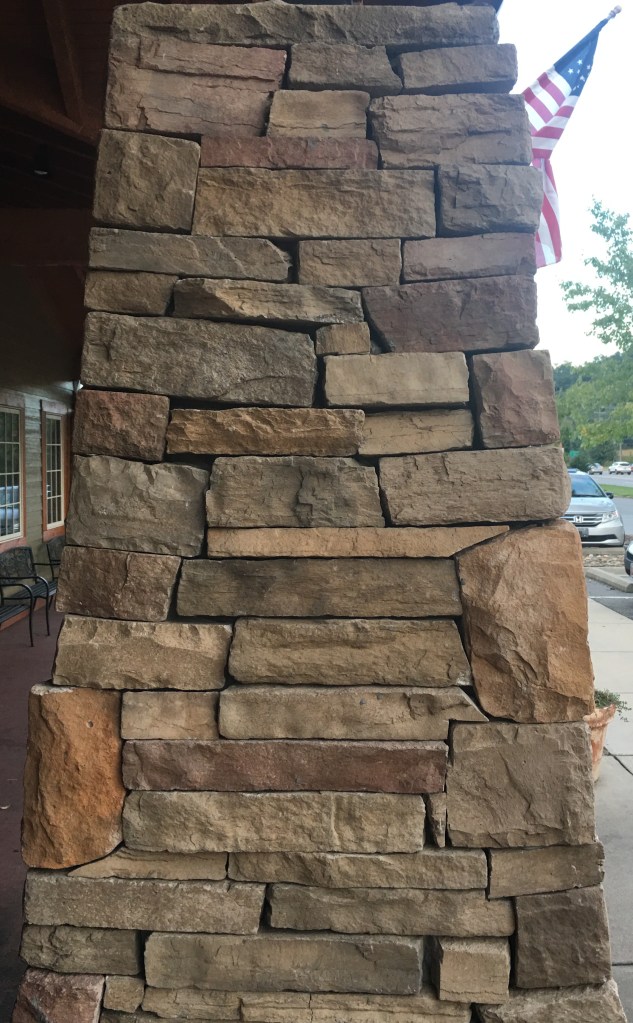
Look how the corner pieces slope
Corners again. Plus trimming?
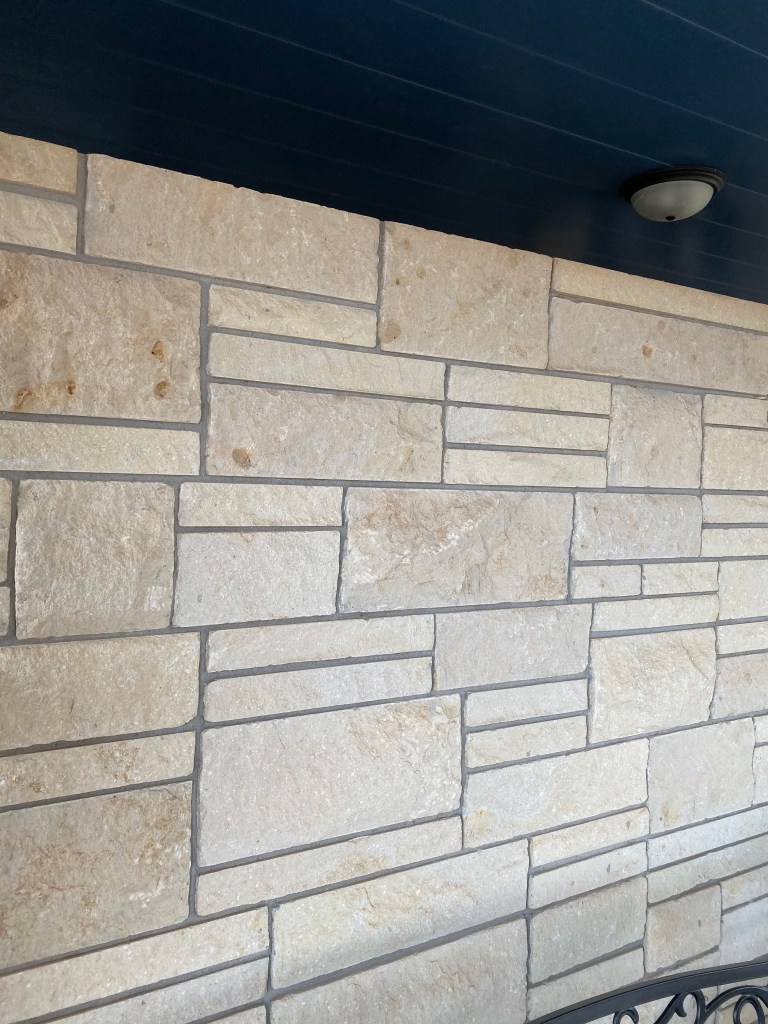
Getting seasick….
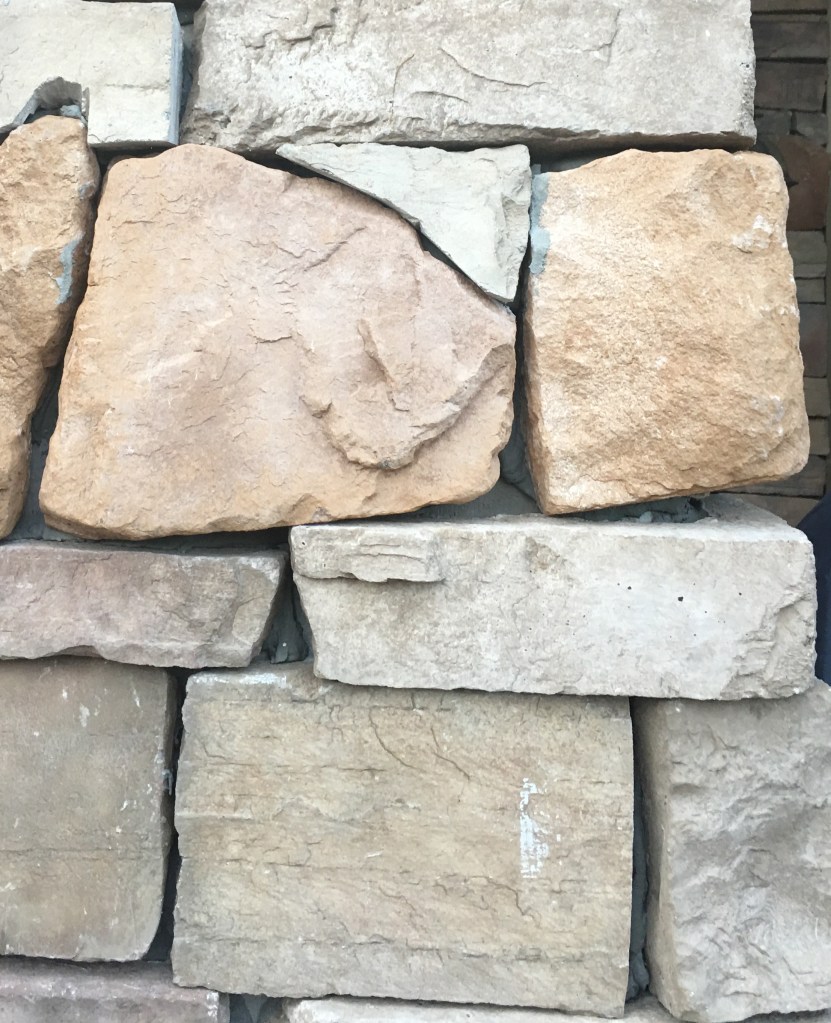
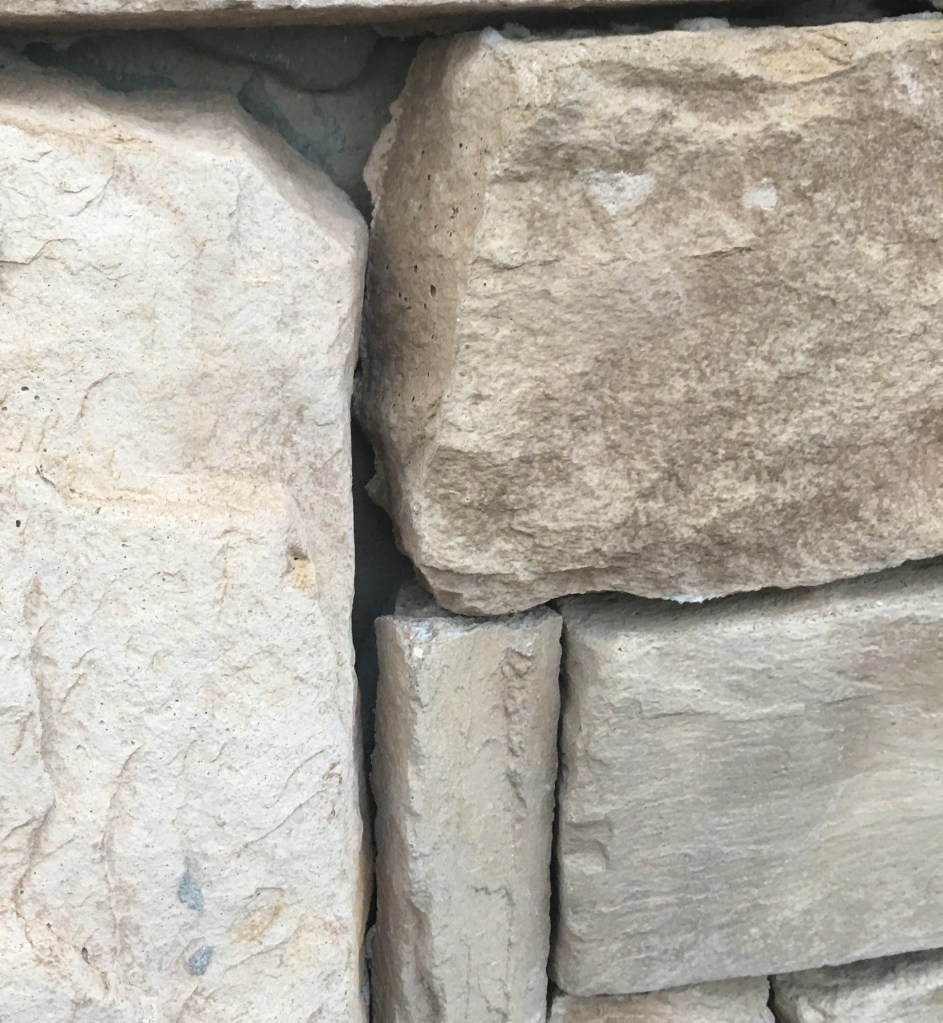
Ok, there’s a lot going on with this install in terms of problems, but these three photos highlight a very common problem. There are a lot of projects putting pyramid-style pillars on buildings. They are a cool architectural detail. The problem that often happens is a lack of detail into the stone being installed on these. If you were using a Full Veneer (stone 3″-5″ bed depth for the stone) the mason can trim the stone to follow the contour of the pillar. A thin veneer (in this case a fake stone) has a 90 degree angle on its corners. If the mason sticks the stone directly and tightly to the backer, it creates a drooping affect making the stone look like the corner return is running downhill. If they don’t adhere the stone tight so the stone stays level to the eye, you have the problem shown in the third picture. The upper left stone sticks further out than the stone below. Not to mention the stone is now not installed correctly and could easily fall off the wall.
When installing a Thin Veneer on a pyramid pillar like this, the best option is to use a stone in a mosaic pattern. This will completely eliminate the problems (I can’t guarantee the mason won’t trim like a hack like shown in the first two pictures).
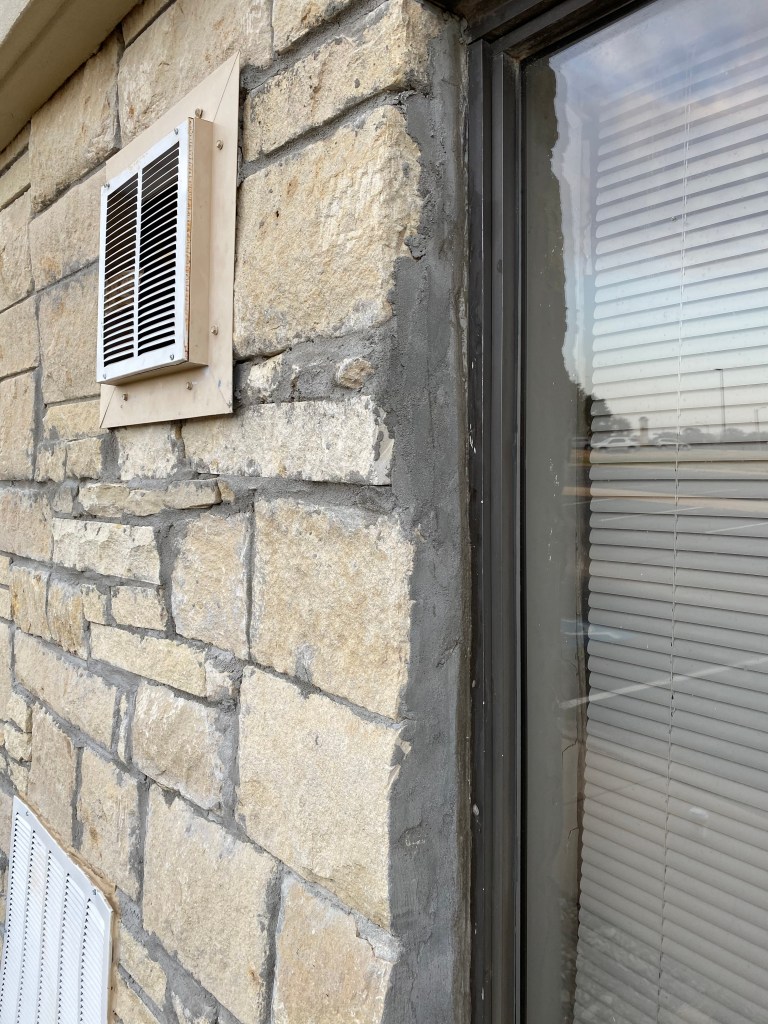
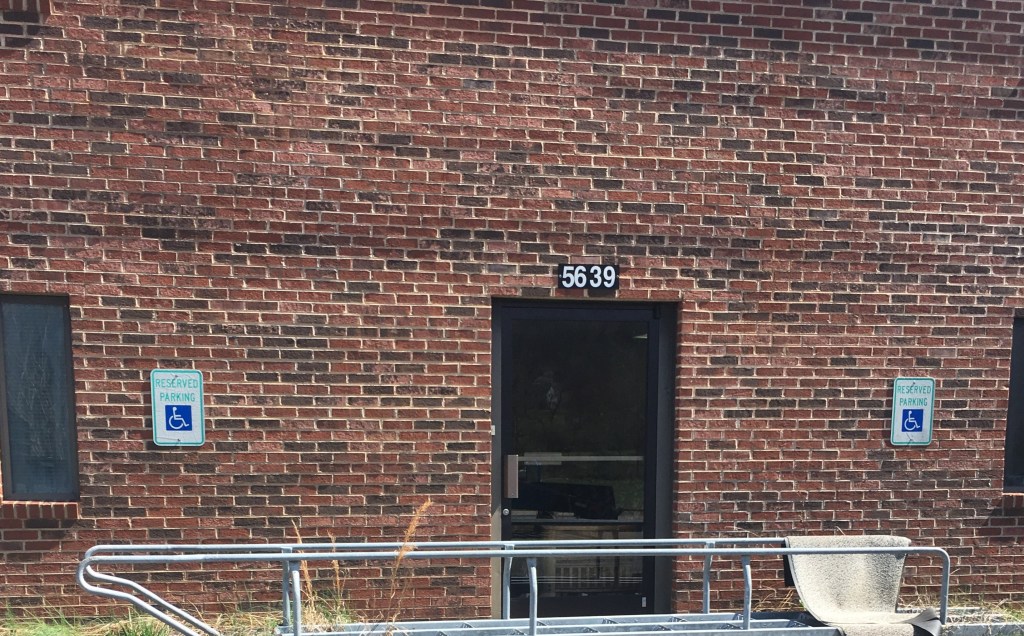
Shortcut on the frontend – problems for the long-term
This is something I haven’t seen a lot, but I get the problem. I should have went closer to get a better picture of the drip edge under the window. There is no sill under the window, which would have helped because sills get installed with a slight pitch so when the water is runs down the window it hits the sill (be it brick or stone) and goes to the edge and “drips” off the lip of the masonry and doesn’t run down the face of the masonry below. These metal “sills” used are just as long as the window, so the water streams down the wall. A best practice if they would have done this in my opinion would have been running it past the ends of the window and adding an end dam to the flashing. A brick or stone sill, then the flashing and drip edge would have been the best option.
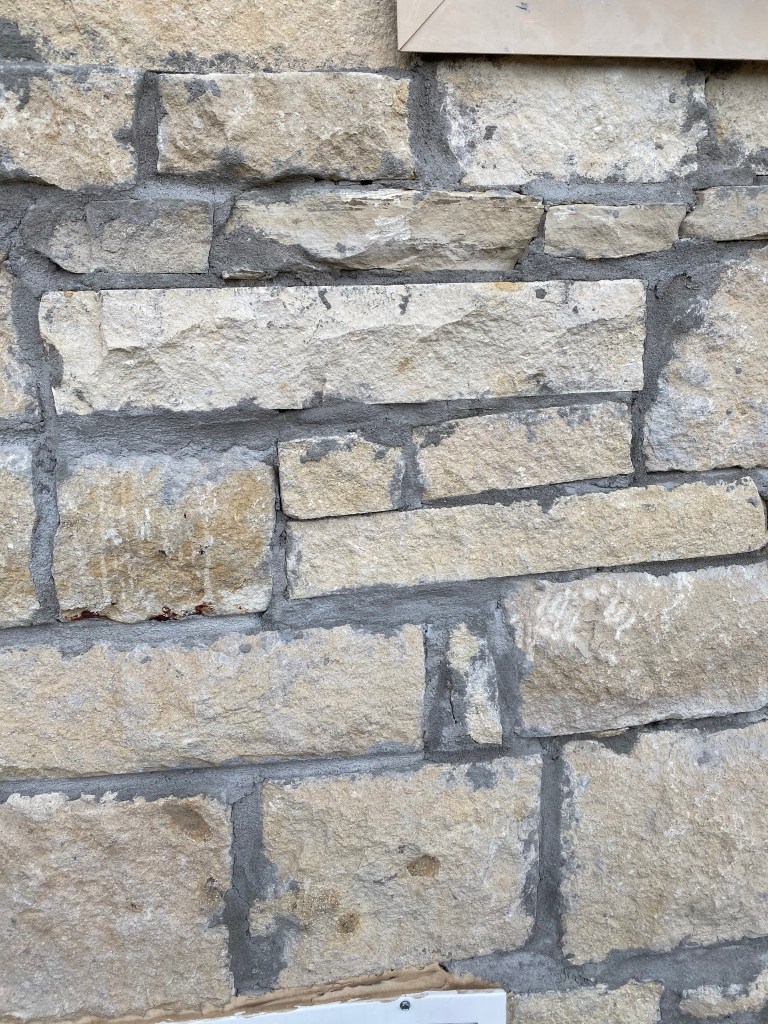
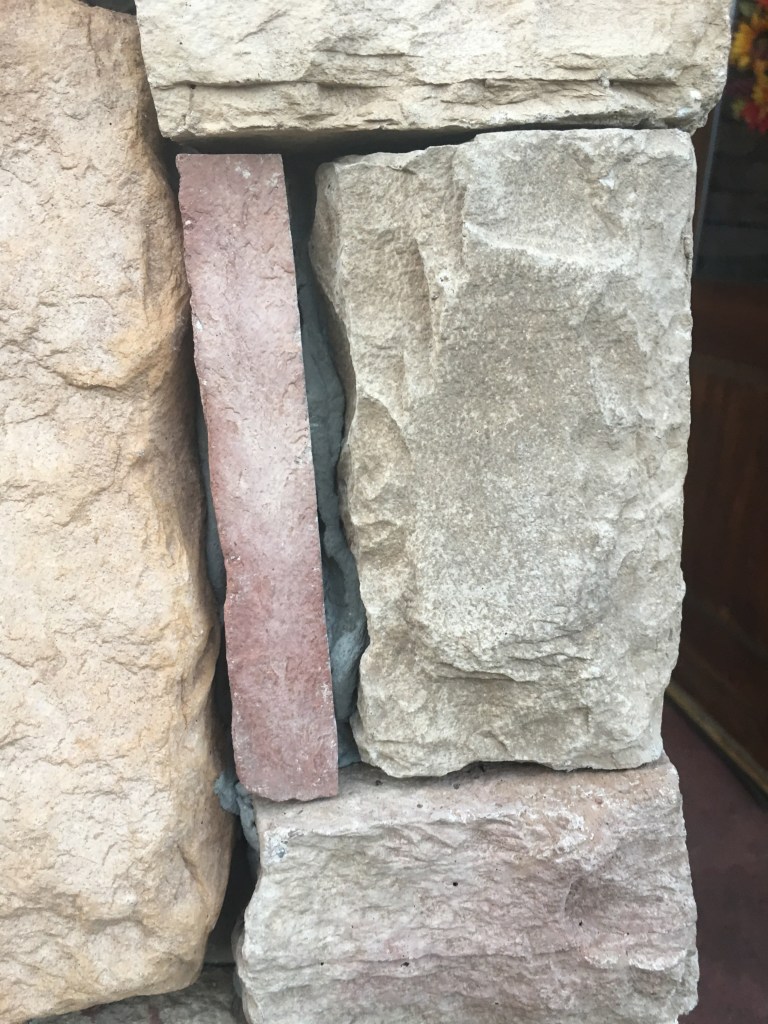
Gap at the corner shows no mortar
You can see between the stone and mortar
You can see between the stone and mortar
You can see a gap between the back of the stone and the backup wall.
This is another problem I see often, and am surprised it’s still so common considering how much it is discussed in the masonry world. The problem here is not applying mortar or thinset on the entire back of the stone. So often an installer will just plop some mortar in the center of the stone and wiggle it into place. A drystack install like this is critical to cover the entire back of the stone, as it allows water to easily get behind the stone. Eventually the stone, especially in areas with freezing and thawing, will fall off the wall. A better install besides making sure to cover the entire back of the stone would be to use Laticrete products like MVIS veneer mortar and Air and Water Barrier.
A good example of bad coverage to the back of the stone
This install, similar to the one above, shows the stone isn’t getting compete coverage on the back of the stone. You can see it’s sticking quite well to the wall. In this case there was a construction change that resulted in some of the stone needing to be removed. This allowed us to see how it was installed, and once again just some plops of mortar or thinset on the back – not full coverage.
In my next masonry blog post I’ll highlight some really great project. Great projects are not just because the work looks good, it is also done right. Maybe you seen or been on a project like that – great flashing work, consistent joints, quality materials. I’d love if you’d share some with me. I’d be glad to include them in my posts.
Follow my Instagram for more projects, some family fun, all things Buechel Stone.
To me, it’s impossible to have a family business without really showing the world what makes your family tick. As a father of five, my wife Nikki and I are consistently moving at mach speed to maintain harmony for all aspects of life. This blog is a backstage view of my work/life balance at Buechel Stone. It is very important to me that our #rockstars have a great day at work, and we do what we can to make their home life even better. By focusing on a strong work environment, we know our customers will have the best experience in the natural stone industry. I will also highlight examples of masonry work, so you too can spot greatness in the art of masonry.


Leave a comment